
Imagine walking into your kitchen and being greeted by the tangy aroma of freshly made yogurt. Sounds dreamy, right? Making yogurt at home from milk isn’t just a culinary adventure; it’s a ticket to a world of creamy goodness that’ll have your taste buds doing a happy dance. Plus, you’ll impress friends and family with your newfound skills—who doesn’t love a homemade treat?
Ingredients Needed
Making yogurt at home requires just a few key ingredients. These essentials ensure a successful fermentation process and delicious results.
Types of Milk
Dairy options for yogurt include whole milk, low-fat milk, and non-fat milk. Whole milk creates creamier yogurt. Low-fat milk balances richness and tartness. Non-fat milk produces a lighter texture. For those who prefer plant-based options, almond milk and coconut milk can be great alternatives, though adjustments may be necessary for consistency and flavor.
Yogurt Starter Cultures
Yogurt starter cultures provide the necessary bacteria for fermentation. Select a commercial yogurt with live active cultures for best results. Look for brands that contain strains such as Lactobacillus bulgaricus and Streptococcus thermophilus. Alternatively, using a previous batch of homemade yogurt serves as an effective starter. Freeze-dried cultures also exist, offering flexibility for various recipes.
Equipment Required
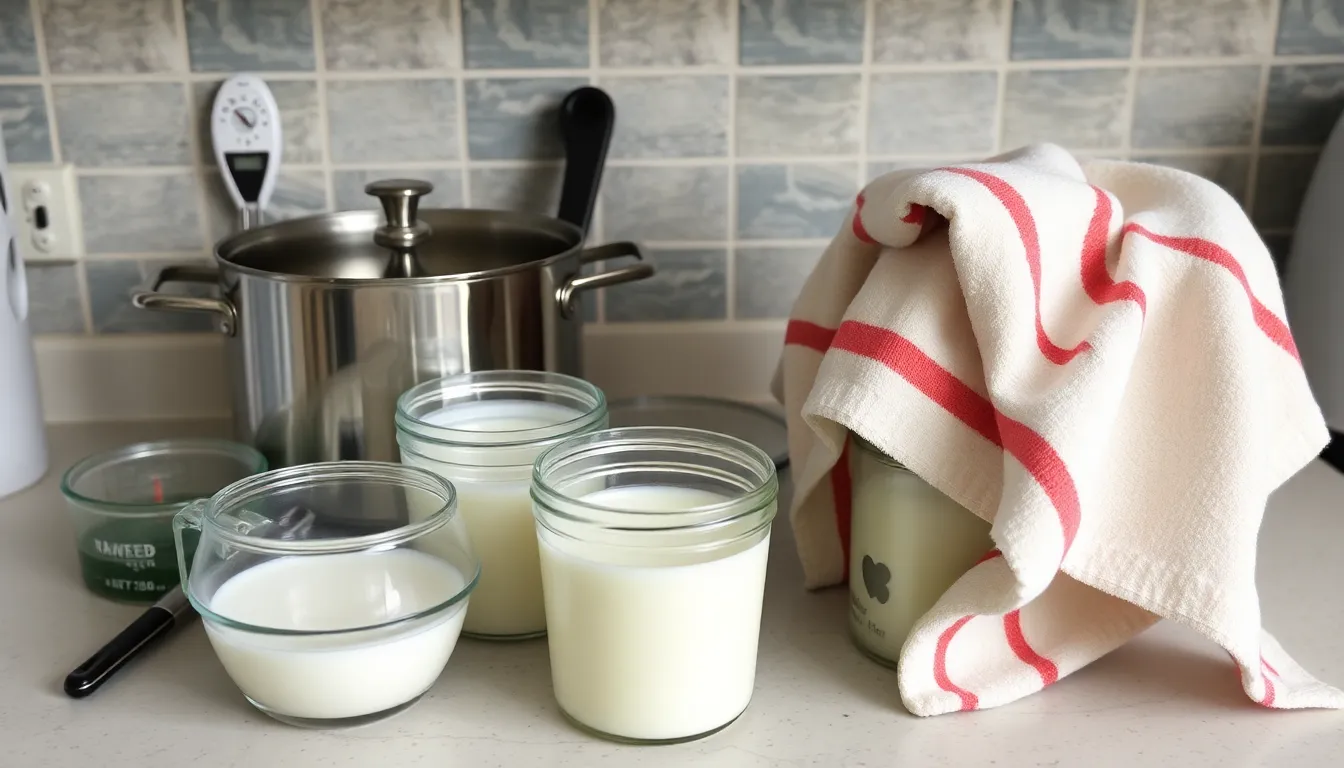
Making yogurt at home requires specific equipment to ensure a successful fermentation process and optimal results. The following tools enhance the yogurt-making experience.
Essential Kitchen Tools
- Saucepan: A medium-sized saucepan heats milk evenly.
- Thermometer: A food thermometer ensures accurate temperature control.
- Whisk: A whisk mixes ingredients thoroughly and incorporates air.
- Measuring Cups: Accurate measuring cups allow for precise ingredient ratios.
- Containers: Glass or plastic containers store the yogurt during fermentation.
- Towel or Blanket: A towel provides insulation, maintaining a warm environment for yogurt cultures.
Optional Gadgets
- Yogurt Maker: A yogurt maker simplifies the process by maintaining a constant temperature.
- Slow Cooker: A slow cooker can serve as an incubator for the yogurt.
- Blender: A blender combines milk and starter culture efficiently.
- Fermentation Jar: A fermentation jar maintains ideal conditions for specific yogurt types.
- Ice Cream Maker: An ice cream maker can churn yogurt into a creamy treat post-fermentation.
Step-by-Step Process
Making yogurt involves a series of straightforward steps to ensure a successful outcome. Follow these simple instructions for homemade yogurt from milk.
Preparing the Milk
Start by pouring the desired amount of milk into a medium-sized saucepan. Heat the milk over medium heat until it reaches 180°F (82°C). This step helps kill any unwanted bacteria and improves the yogurt’s texture. After heating, remove the saucepan from the heat and let the milk cool down to 110°F (43°C). Use a food thermometer to check the temperature accurately. While cooling, consider adding milk powder for thicker yogurt. This optional ingredient adds richness to the final product.
Incubating the Yogurt
Once the milk has cooled, add the yogurt starter culture. Stir in 2 to 3 tablespoons of yogurt with live active cultures for proper fermentation. Mix gently to ensure even distribution. Pour the milk mixture into clean containers suitable for fermentation. Cover these containers with lids or plastic wrap to maintain warmth. Place the containers in a warm, draft-free area or use a yogurt maker. Keep the yogurt at a consistent temperature between 110°F and 115°F (43°C to 46°C) for 6 to 12 hours. Check periodically; longer incubation times yield tangier yogurt.
Cooling and Storing
After fermentation, it’s crucial to cool the yogurt to halt the fermentation process. Transfer the containers to the refrigerator for at least 2 hours. This cooling period allows the yogurt to set properly. Once cooled, check the consistency and flavor. For storage, keep the yogurt in airtight containers to maintain freshness. Homemade yogurt lasts up to 2 weeks in the refrigerator. Save a portion to use as a starter for your next batch, reinforcing the homemade yogurt tradition.
Troubleshooting Tips
Making yogurt at home can sometimes pose challenges. Identifying common issues helps in achieving that perfect batch.
Common Issues
Inconsistent texture often occurs, leading to yogurt that is either too runny or overly thick. Temperature fluctuations during fermentation affect the yogurt’s consistency. Off-flavors may appear if the starter culture is old or if there’s contamination. Additionally, insufficient fermentation time can result in yogurt that’s not tangy enough.
Solutions for Successful Yogurt
Maintaining a stable temperature between 110°F and 115°F enhances fermentation. Using fresh starter cultures containing live active cultures improves flavor and texture. When a runny consistency appears, add more milk powder to the mixture. Adjusting fermentation time between 6 to 12 hours allows flexibility in flavor development, ensuring it meets personal preferences. Regularly checking the yogurt during fermentation helps to catch potential issues early.
Making yogurt at home is a rewarding experience that combines creativity with culinary skills. With just a few ingredients and the right tools anyone can enjoy the satisfaction of crafting their own creamy yogurt. The process allows for customization to suit personal tastes whether it’s adjusting the thickness or flavor profile.
Troubleshooting common issues ensures a successful batch every time. By maintaining the right temperature and using fresh starter cultures anyone can achieve delicious results. Homemade yogurt not only enhances meals but also serves as a healthy snack option. Embracing this simple yet fulfilling endeavor can lead to countless delicious creations.