Ever thought about turning that spare room into a mini pottery studio? With a little clay and creativity, anyone can unleash their inner artisan. Making pottery at home isn’t just a fun way to spend an afternoon; it’s a chance to create unique pieces that’ll impress friends and family—or at least give them a good laugh when they see your “abstract” vase that looks more like a lopsided pancake.
Understanding Pottery
Pottery involves shaping clay into functional or decorative objects through various techniques. This art form dates back thousands of years and remains a popular pursuit for creative individuals at home.
What Is Pottery?
Pottery refers to ceramic ware made by shaping moist clay and firing it in a kiln. The process transforms clay into durable objects, ideal for everyday use or aesthetics. Artists can create various items, including dishes, vases, and sculptures. Skills in pottery range from basic hand-building techniques to advanced wheel-throwing methods. Each piece can reflect the artist’s personality and style, making pottery a unique form of self-expression.
Types of Pottery
Numerous types of pottery exist, each serving different purposes and styles. Earthenware represents one of the most common types; it is porous and often unglazed, making it suitable for decorative pieces. Stoneware, known for its strength, often features a high firing temperature and a non-porous quality, ideal for functional items like dishes. Porcelain, with its fine texture, is typically used for high-quality, delicate pieces, while raku pottery, known for its vibrant glazes, emphasizes a unique firing technique. Each type presents distinct characteristics and opportunities for creativity in home pottery projects.
Essential Tools and Materials
Pottery requires specific tools and materials to create beautiful pieces at home. Gathering the right items sets the foundation for successful crafting.
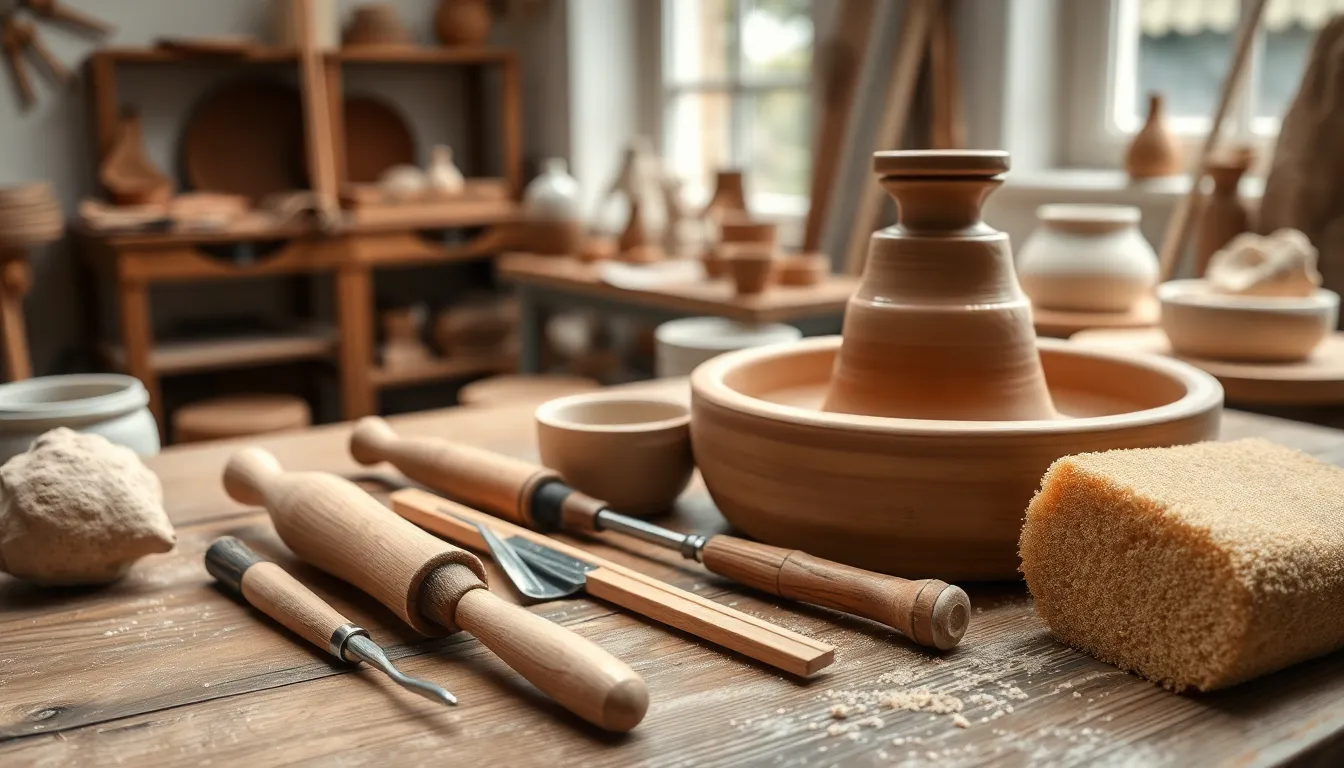
Tools You’ll Need
Essential tools for pottery include a pottery wheel, sculpting tools, and a rib tool. A pottery wheel helps shape the clay while it spins. Sculpting tools allow for detailed carving and shaping. A rib tool smooths surfaces and creates curves. Additionally, consider investing in a rolling pin for flattening clay and a sponge for adding moisture during the process. These tools make the creation process easier and enhance the quality of finished products.
Choosing the Right Clay
Selecting the appropriate clay type is crucial for achieving desired results. Earthenware, stoneware, and porcelain each offer unique properties for projects. Earthenware is easy to work with and great for beginners. Stoneware, known for its durability, performs well in functional items. Porcelain, often used for fine artistry, requires more skill but results in stunning pieces. Consider project goals and personal skill levels when choosing clay.
Preparing to Create
Creating pottery at home requires careful preparation. Setting up a dedicated workspace makes the process smoother and more enjoyable.
Setting Up Your Workspace
Select a quiet area with ample space for crafting. Ensure surfaces are sturdy and covered with a protective layer, like a plastic sheet or old newspapers. Gather essential tools, including a pottery wheel and sculpting tools. Consider good lighting to enhance visibility during detailed work. Store clay and supplies nearby for easy access. Organize your workspace by clearing away unnecessary items. A clutter-free environment fosters creativity and focus.
Basic Pottery Techniques
Familiarize yourself with several fundamental pottery techniques. Pinching is a simple method that involves shaping clay with fingers to create small vessels. Slab building uses flat pieces of clay to construct various forms. Coiling consists of rolling out long strands of clay, stacking them to build larger pieces. Throwing on a wheel offers precise shaping through rotation. Each technique varies in complexity and results. Experiment with them to discover personal preferences and styles. Clay’s malleability allows for endless creativity, prompting exploration and satisfaction in the craft.
Step-by-Step Process
Creating pottery at home involves engaging with various techniques. Mastering these skills enables individuals to craft unique pieces tailored to their style.
Hand-Building Techniques
Hand-building techniques allow for creativity and flexibility in shaping clay. Pinching creates simple forms through fingers pressing and molding. In slab building, clay is rolled into flat sheets and combined into desired shapes. Coiling involves rolling clay into long strips and stacking them to form walls. Each method lends itself to personal expression, making it easy for hobbyists to produce distinctive items. Exploring these techniques promotes a deeper understanding of the medium.
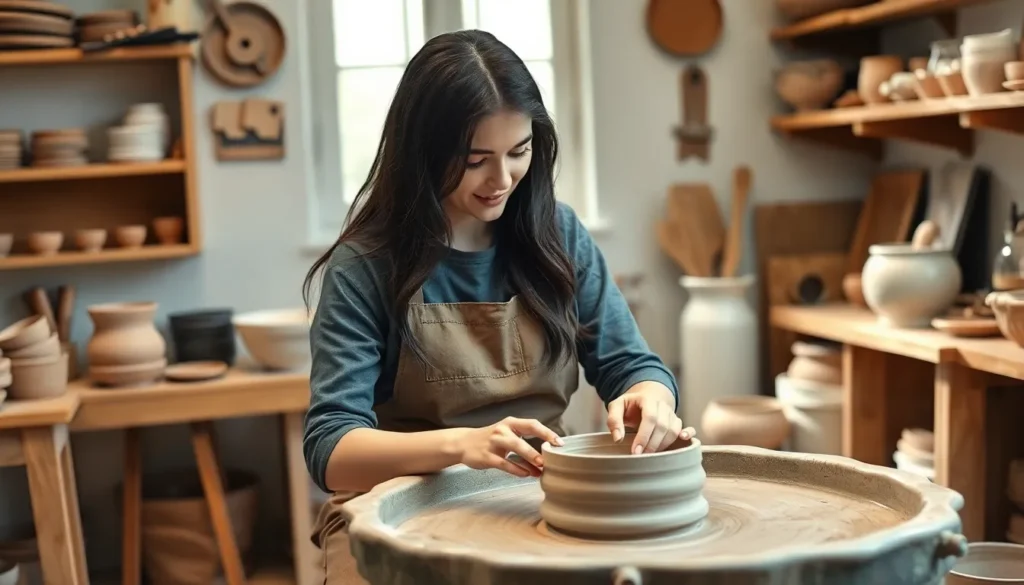
Wheel-Throwing Basics
Wheel-throwing combines skill and rhythm for crafting symmetrical pottery. Beginners start with centering clay on the wheel, a crucial first step. Then, they use their hands to shape the clay as it spins, creating a vessel. Proper pressure and technique control are vital for momentum and stability. Grasping these fundamentals leads to more intricate designs, enhancing the overall pottery experience. It’s essential to practice regularly to develop precision and familiarity with the wheel.
Glazing and Firing
Glazing and firing are crucial steps in the pottery-making process. These techniques enhance both the appearance and functionality of the finished pieces.
Choosing Glazes
Selecting glazes involves considering desired colors and finishes. Many glazes come in matte, glossy, or satin varieties, impacting the final aesthetic significantly. Testing different glazes on sample pieces provides insight into how each reacts during firing. It’s important to match the glaze to the clay body for optimal results. Additionally, food-safe glazes ensure usability for dinnerware. Researching various brands and formulations offers a broad spectrum of choices tailored to specific pottery applications.
Firing Your Pottery
Firing pottery requires careful attention to temperature and duration. Bisque firing typically occurs first, hardening the clay and preparing it for glazing. After applying glaze, a glaze firing follows, reaching higher temperatures to mature the glaze and bond it to the clay body. Electric kilns allow for controlled firing schedules, while gas kilns provide unique effects. Monitoring the kiln’s temperature throughout the process ensures consistency and prevents defects. Always allow pieces to cool gradually to avoid cracking, and prioritize safety when operating the kiln.
Troubleshooting Common Issues
Pottery making can present challenges. Understanding common issues helps improve the craft.
Cracks in Clay: Drying clay too quickly causes cracks. Covering pieces with plastic can slow down the drying process. Adjusting humidity levels in the workspace also helps prevent this.
Uneven Thickness: Inconsistent thickness leads to weak areas. Regularly check the clay’s thickness while shaping. Using a rib tool can create a more uniform surface.
Sinking Bases: A sinking base occurs when the clay is too wet or the pot is too heavy. Allowing the clay to firm up before throwing can minimize this issue. Redistributing weight during shaping provides better balance.
Bubbling Glaze: Bubbling may indicate improper glazing techniques. Applying glaze too thickly causes bubbles during firing. Testing glazes on sample pieces can identify issues before applying to final works.
Under-fired Pieces: Inadequate firing results in soft, fragile pottery. Monitoring kiln temperature ensures proper firing cycles. Referencing temperature charts can provide guidance for specific clay types.
Over-glazed Items: An overly thick glaze can lead to running off pieces. Observing guidelines for glaze application helps achieve optimal results. Striking a balance between thickness and coverage ensures durability.
Warped Forms: Warping during firing occurs from uneven wall thickness or temperature fluctuations. Keeping the kiln at a consistent temperature can minimize this. Making adjustments during the drying phase also helps maintain shape.
Blemished Surfaces: Imperfections often arise from dust or debris on the pottery. Keeping the workspace clean reduces the risk of contamination. Consider wiping surfaces before glazing to eliminate potential marks.
Addressing these common issues enhances the pottery-making experience. With patience and practice, solutions become evident, allowing for growth in this artistic pursuit.
Pottery at home offers a fulfilling way to express creativity and craft unique pieces. With the right tools and techniques anyone can transform clay into beautiful functional art. Setting up a dedicated workspace and mastering basic pottery methods empowers individuals to explore their artistic potential.
As they navigate through the processes of shaping glazing and firing their creations they’ll not only develop skills but also find joy in the journey. Embracing challenges and learning from mistakes enhances the experience making each piece a testament to their growth. Whether for personal use or as gifts pottery making is a rewarding endeavor that brings satisfaction and a sense of accomplishment.